Wednesday, January 28, 2009

Dinner


Modified oyako donburi:
1 c rice
1/2 tub tofu, cubed
hoisin sauce
oyster sauce
sriracha
peanut or other oil
egg, lightly scrambled
Cook rice. Heat sauces (I used ~1/2 tbs each hoisin and oyster, ~1 tsp sriracha) and oils in a frying pan at medium heat then add tofu. Let tofu cook evenly on all sides, but don't worry too much about perfection: just kick it around every few minutes. When nicely browned to taste, pour in egg and cook until firm. Spoon over rice and add bonito flake/nori seasoning and soy sauce.

Gingery-sweet:
real ginger ale
maraschino cherries and syrup (Reed's Extra Ginger or Cock & Bull)
bitters
candied ginger
whiskey (optional)
Add a dash of bitters and ~2 tsp maraschino cherry syrup to ginger ale, add cherries and ginger.

Tuesday, January 13, 2009

Mexican Chocolate Bread Pudding

Mexican Chocolate Bread Pudding, as adapted from Recipezaar's Sourdough Bread Pudding


4 c cubed sourdough bread, very stale
1/2 c chocolate chips
2 c plain soy milk (because that's what I had on hand)
1/4 c heavy cream (to make up for the fact that I was only adding one, not 1.5, egg yolks)
3 eggs
1 egg yolk
3/4 c sugar
2.5 Tbs dark cocoa powder
1 Tbs vanilla
1/8 tsp ground nutmeg
1/4 tsp almond extract
1 tsp ground cinnamon

Grease a souffle dish or casserole pan and add the chocolate chips and bread cubes. Beat together everything else, then pour into the dish and stir, making sure the bread is all coated.

Cover with plastic wrap and let soak for at least two hours, preferably overnight. Then bake at 350°F until the center tests clean, abt 50-60 min.

Tuesday, January 6, 2009

Dark Rye Bread

Dark Rye Bread from Real Bread: A Fearless Guide To Making It


1 Tbs active dry yeast
0.25 c lukewarm water
1.5 c hot water
2 Tbs butter, cut into bits
0.25 c brown sugar
0.25 c molasses
2.5 c dark rye flour
3 c AP flour
1 Tbs salt
2 tsp grated Satsuma orange peel
0.5 tsp anise seeds, lightly crushed

1. Proof yeast in lukewarm water.
2. Combine hot water, butter, sugar and molasses in large bowl, stir to melt and dissolve, then cool to lukewarm.
3. Add proofed yeast, rye flour and 0.5 c AP flour. Beat until air bubbles form.
4. Stir in salt, seeds and peel, keep stirring as you slowly add AP flour until a stiff dough forms.
5. Knead on floured board for 8 min until smooth, pliable and firm, or like I did, let the stand mixer work at it with a dough hook until the firm stage. The recipe notes that the dough is VERY sticky until "suddenly it stops, and you know you've won."
6. Make into a ball, put into oiled bowl, turn to coat with oil, cover with a dampened towel and let rise in a warm place for 1:40, or until it has doubled in size.
7. Punch down, knead briefly and divide into 2 equal leaves and let rise on an oiled baking sheet, covered with a dampened towel. Let rise for another 1:40 or until almost doubled.
8. Brush with a water-molasses wash, score and bake in a 350°F oven for 40 min or until bread tests done. About 10 min into baking, spray loaves with water and shut the door. Spray again halfway through baking when you rotate the baking sheet.
9. Transfer to wire rack and don't cut until it's cool.


This worked very well with the broccoli-cheese soup my friend made. It was light, well-crusted and had just enough anise and orange taste to make it interesting.

Sunday, December 21, 2008

risotto, demystified

Wait, don't run away; it's easy, I promise! If you've never made risotto before, I'm here to help.

When I think of risotto, I think of love. It is a dish that is made with care (compared to boxed mac and cheese), and is almost always appreciated by those you make it for. Since the end product has such a rich and creamy consistency, risotto is made with a special kind of rice, instead of long-grain, as it needs a high starch variety that is able to absorb a lot of liquid and release said starch. Arborio is the type I see most often in grocery stores, but there are certainly other kinds of rice (and real Italians would probably have some opinions).

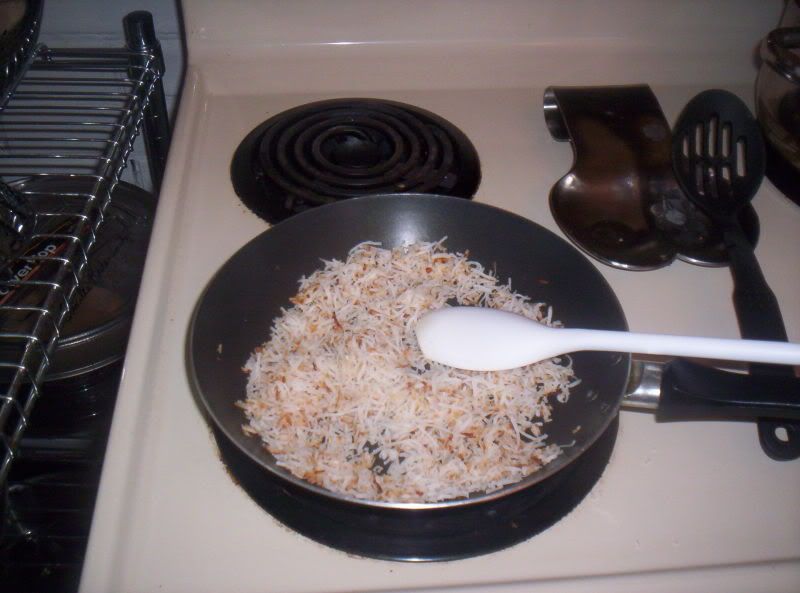
Step 1: Heat up some oil or butter in a medium saucepan over medium heat. Add 1 cup of rice and stir to coat the grains with the fat and cook for a minute or two. (Meanwhile, heat up about 2-3 cups of stock in a separate pot and keep it hot for later steps. If I'm lazy I'll just zap some stock in a large pyrex measuring cup for liquids, and continue zapping it to maintain temperature. Adding hot liquid to the cooking rice is important in maintaining the overall temperature of the cooking environment; adding cold stock will halt the absorption process until everything can come back up again, and we want to avoid rollercoasters.)


Step 2: Add a good slosh of white wine to the rice. It doesn't have to be great, I usually just use the token mostly-consumed bottle hanging out in the fridge. Stir occasionally until the wine is absorbed.

Step 3: Add about 1 cup of hot stock to the rice. Stir every few minutes. You will get a better product if you stand there and stir more frequently, but for everyday purposes I don't think it's necessary. The purpose of stirring is to loosen starch molecules from the surface of the rice grain and distribute it into the liquid component (stock), allowing the rice to uniformly absorb more liquid and release more starch. This is where the creamy consistency develops. 
*A note about heat: you want the risotto to be ever so slightly bubbling, but definitely not boiling. Barely simmering. Otherwise a gooey burnt-on fate awaits!


Step 4: Continue stirring until the liquid is mostly absorbed. Add another cup of hot stock. Continue stirring until almost absorbed. 

Here is the judgement call. It is traditional to cook the risotto for 17 minutes total since the wine was absorbed. This results in a grain that still has "bite" to it, and is al dente. In Italy, a finished risotto is supposed to be "looser," that is, the grains are surrounded by more liquid, than is typically served in the US. Some advocate for the risotto to be removed from the heat a few minutes before it is done and covered so that it can finish by residual heat. Depending on your palate, you may want the grains softer, or what have you.

If you don't have a lot of experience, I recommend finishing it yourself, so being involved with it until you think it's ready, instead of covering it up early and hoping for the best. You might have to taste it a lot, but sometimes we have to make delicious sacrifices. Buck up.

Step 5: Once you've decided it's ready, remove from heat and add a few pats of cold butter and some finely grated parmesan (or other similar cheese), and stir it all in. Yum! I like to add some more cheese on top when I'm about to dig in.

Variations exist as far as the eyes can see. Meat, no meat, veggies, herbs. Another "kitchen sink" medium. I usually sauté some finely chopped onion or mushrooms in the bottom of the pot before I add the uncooked rice. You can add things along the way, or wait to stir it all in at the end. In pictured rendition above, I roasted some cauliflower (drizzle of olive oil, salt and pepper, 350 degree oven until lightly browned), chopped it up, and added it to the risotto towards the end. I also added some sage, because I'm going through a slight obsession with this herb at the moment. Also, check the salt! Depending on the stock you've used, the risotto can use a lot of extra salt.

The one hairy thing about risotto is that it should be eaten as soon as possible after you've deemed it done! You definitely don't want it sitting around because it will continue to cook and dry out. This is why risotto at large-scale catered events are usually so gluey-horrible! 

Hope this guide helps! Here's a final rundown of the recipe components in case you don't like the stream-of-consciousness:

Roasted Cauliflower and Sage Risotto:
1 cup arborio rice
1 cup white wine
2 cups vegetable stock
1/2 yellow onion, finely chopped
1 medium head cauliflower, coarsely chopped, and roasted in 350 degree oven
1 tsp dry rubbed sage
butter
parmesan cheese, finely grated


Cinnamon-Coconut Cake: Snow Day Baking

Coconut-Cinnamon Cake, from Big City, Little Kitchen

Preheat oven to 350F and butter a 9" square pan. (recipe calls for a 9-10" Bundt pan.)

Toast 3/4 c shredded coconut in a dry skillet over medium heat until lightly browned. Don't burn it like I did.


Zap 4 Tbs butter and 1 c canned unsweetened coconut milk in a microwave until butter is melted. (I halfway melted the butter first, then zapped the milk and butter a little longer.)

Beat 4 large eggs and 1.5 c white sugar until "pale and fluffy" or your hand mixer's arm gives out.


Add 1 tsp vanilla and stir in 2 c AP flour, 1 tsp baking powder, 1 tsp cinnamon and pinch of salt until just combined. (The cinnamon was double what the recipe called, but we didn't find it cinnamony enough. Double it again!)

Then, while continuing to mix, add the coconut milk and butter mixture.


Scrape into the pan and bake at 350F for 60 min, rotating halfway.


Enjoy!

fancy-lookin chicken


While I'm home visiting my folks, I usually like to cook them a few nice meals. For one, my dad pays me back for groceries, so I can go all out and get the fancy stuff. Also, they have a lovely kitchen (though I may be biased... it is the kitchen I learned to cook in). In any event, I wanted to whip something up for them tonight, but lacking access to a car (and this being a lovely suburban area where the nearest store is a 45 minute walk away), I decided to fridge forage and figure something out.

After a brief search, I found some chicken breasts, feta cheese, jarred (marinated) artichoke hearts, and other assorted goods. It's just begging to turn into stuffed chicken breasts, one of my favorite renditions of this often bland and belittled cut of meat. Not only does it come out completely juicy, but it is a stunning presentation that makes you look like a total kitchen stud, when very little skill is actually required. Let me show you!


First, lay a chicken breast flat on a cutting board. Take the knife parallel to the board, and make a shallow slit almost down the length of the breast, making it about an inch short on both ends so that you have a pocket. Work your thumbs into the slit (don't be afraid) and peel the meat apart so you enlarge the pocket to almost the other side:


So now we need to make a stuffing. This can be almost anything you like. Most people make cheesy based pastes including some aromatic herbs or spices. I like to think of this as "kitchen sink" time, where you can mix up pantry stragglers, small portions of leftovers, whatever flavor combination moves you. Tonight I wanted a mediterranean flavored meal. I was using some chopped onion in a side dish, so I just scooped out some extra I had been softening and added it to the stuffing. It could be just as good with some raw onion. Strong flavors are great because that will infuse the chicken with yummy aromas during the cooking. 
Here is a rough recipe:

Mediterranean Chicken Stuffing:
Mix the following in a bowl:
1 cup feta cheese (crumbled)
5-6 fresh basil leaves, chopped
1 small jar marinated artichoke hearts, drained and coarsely chopped
1 Tbsp sun dried tomatoes, coarsely chopped
1/4 cup onion, diced and sauteed to translucent 
salt, pepper to taste


Take about 1/4 cup of the stuffing, and gently but firmly stuff into the pocket cavity. Make sure it gets all the way in to the back of the space. You don't want to pack it tightly, it should be loose as we'll want to close things up for cooking. Add more or less depending on the space available.

The next step is to close up the pocket so all the cheesy goodness stays inside. To seal things up, some people use some cotton string or toothpicks. I had some long skewers on hand, so I coated them in olive oil (otherwise burning ensues, ick) and weaved them back and forth to create a seam:


OK, almost done. That was all the fussy set up work, and really it wasn't so bad, was it? We're on to the last two steps: browning and baking. Simple!  Heat up a skillet (bonus if it's oven safe) with little olive oil. Lay the breasts in the pan and cook about two minutes per side, until lightly browned.

After it is nice and seared, either transfer the meat to an oven-safe container, or if using an oven-proof skillet, simply pick up the whole thing and cook it uncovered in a preheated 350 degree oven for about 12-15 minutes until the meat is cooked through. If I had leftover stuffing, I sprinkle it over the top before I put it in the oven.


Once the meat is cooked and the topping is looking melty, remove from oven and let it rest for about 5 minutes. This helps the juices redistribute so it doesn't all come rushing out as soon as you poke it with something sharp.


Fabulous!! Seriously, this is a definite crowd-pleaser. I served it with steamed asparagus and a roasted-cauliflower risotto (which I will post about tomorrow).

Friday, December 5, 2008

How To Make a Pie Crust

Here is the promised, tardy, photo how-to on making pie crust. Gretchen likes to use a Cuisinart, but not everyone has the toys she does. The non-electric way is pretty fun, and makes a lot less noise--better for late night baking.

This is my favorite pie crust recipe, Cook's Illustrated's Foolproof Pie Dough, which calls for replacing half the water with vodka or some other high-proof hard liquor. I love this recipe because it works via science: gluten makes wheat products such as bread or pie crust chewy, and water is required to form gluten. Therefore, if you remove some of the water, you get less gluten. Vodka allows the dough to be moist and workable without being chewy.

Movement like kneading also encourages gluten formation, so most traditional recipes implore you to work the dough as little as possible. The vodka lets you have a bit more breathing room when it comes to rolling, cutting and manipulating the dough. Don't treat it like a good hearty bread dough, but don't treat it like glass either! Pies are supposed to be fun!

1. Assemble your ingredients: butter (frozen is best), flour, salt, sugar (optional), water and vodka (put these last in the fridge).
Gather your tools: bowl, measuring cups and spoons, masher (potato masher, pastry cutter or...) sturdy fork that could withstand hard ice cream.

2. Slice the butter into chunks the size of marbles. Some people grate the frozen butter instead, which is genius but also results in frozen fingers.


3. Combine butter, salt, sugar and half the flour. Cook's Illustrated has you add the other half later. (The photo of this just looked like a snowdrift. I'm sure you use your imagination.)

4. Using a potato masher, a pastry cutter, or even your hands, mush everything around until the largest butter chunks are the size of peas and everything is coated with flour.


5. Add the rest of the flour and toss around until the butter is relatively evenly distributed in the flour.


6. Get the water and vodka out of the fridge or freezer. If you are using the vodka, I'd either mix it with water to start out with or when adding, alternate H2O with EtOH. Either way, it needs to be cold.


7. Shove all the dough to one side of the bowl and dribble liquid along the side of this slope.


8. Use your fork to drag the moistened dough over to the other side of the bowl and mash like you're combining butter or sour cream into a baked potato.


9. Continue until the whole mass of dough is somewhat evenly moistened. It should be like play-dough in texture, drier if not using vodka or other alcohol in your liquid.


10. Pat into a ball, flatten into a thick pancake and wrap in plastic or wax paper to chill until you're ready to make the pie. (I don't advise storing it longer than overnight; dough I've left in the fridge for longer than that haven't rolled out nicely.)


All that's left is how to turn the dough into a pie crust, and the puree into pie filling. Stay tuned.